I want to like all cards. I want to find a fringe case for every one. This card is very difficult to do just that, but let me try:
Let's start with the reasonable scenarios of controlling 2 or fewer heroes:
1) Running a contract that demands it, such as The Grey Wanderer or At the End of All Things.
2) You deliberately sacrifice your hero, such as Boromir or Caldara
3) You are lending your hero to another player with Desperate Alliance
4) You lose control of a hero in a rescue mission style scenario (akin to Escape from Dol Guldur, but in that case, I believe it's been ruled that you still "control" your captured hero)
Now how could this card help in the above scenarios?
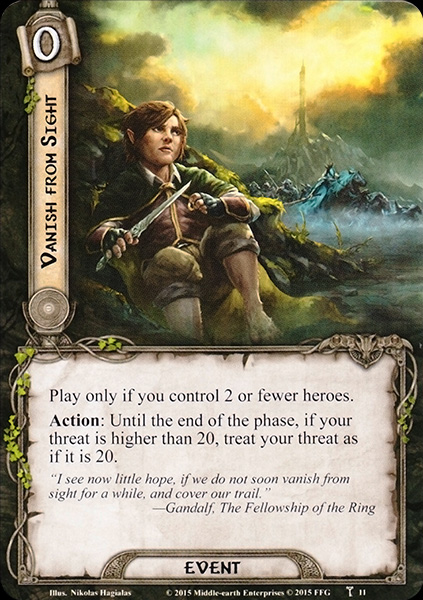
If you are utilizing your threat but include secrecy cards that become more expensive when your threat goes above 20, then this card is certainly a good one to play in the planning phase.
OR
Played during the encounter phase in order to dodge an enemy
OR
To trigger special "enemy's engagement cost higher than your threat" text such as Dagger of Westernesse, Sam Gamgee, and Boromir, most often during either the encounter or combat phases.
There's also a cool combo using A Elbereth! Gilthoniel! that can significantly lower your threat -- for example if your threat is 40, and you are being attacked by an enemy whose engagement cost is 21, if you play Vanish from Sight, not only do you kick this enemy to the bottom of the encounter deck (for free, since you are in secrecy) but you also drop your threat to 21.
Alright short of that... bicycle spokes.